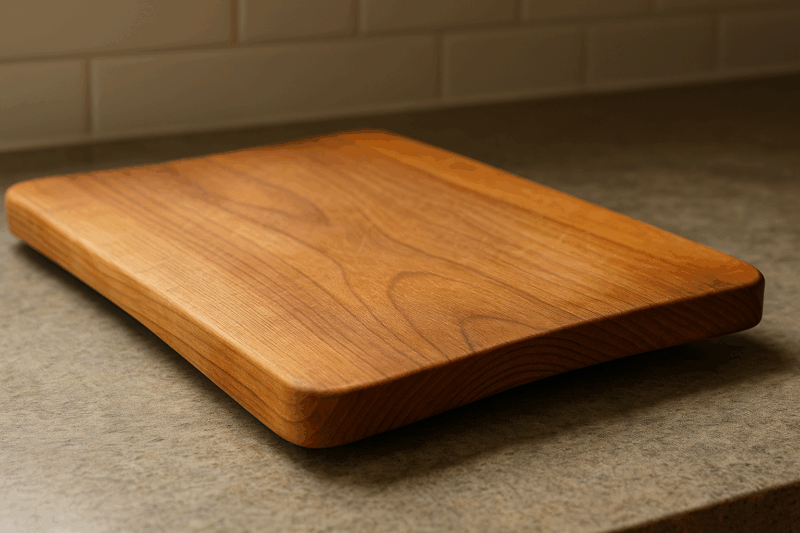
How To Make Classic Edge-Grain Cutting Board That Sells

This is the expanded master guide for making edge grain cutting board projects that look boutique, build fast, and sell reliably at craft shows and online.
Table of Contents
Quick Specs (Snapshot)
- Estimated build time: 2–3 hours active (plus glue/finish cure)
- Difficulty: Beginner → Intermediate
- Average selling price: €55–€120 ($60–$130)
- Best buyers: Kitchen gifts, weddings/housewarmings, premium craft-fair centerpiece
See all 38 projects That Sell Like Crazy Here
Why This Project Sells (Deeper Dive)
Edge-grain boards hit the perfect trifecta of premium look, daily usefulness, and efficient production. The maple/walnut stripe pattern instantly reads “artisan” from across the aisle, while the long-grain surface is kinder to knives and easier for customers to care for than end-grain. For you, making edge grain cutting board inventory means fewer glue lines, simpler flattening, and a workflow that scales: ripping strips → glue racks → flatten/square → profile → sand/finish. At shows, a quick demo—wipe on mineral oil, then buff—creates a “wow” moment and answers objections about care in one motion. Personalization (initials/date/short phrase on the edge or underside) adds margin with minutes of extra labor. And because boards are universal gifts, you can sell all year: holidays, graduations, weddings, new homes, retirements. Pairing each board with a small tin of board butter and a care card not only lifts AOV, it also reduces post-sale questions—happy reviews sell the next batch.
Materials List (12″×18″ / 305×460 mm Example)
Core Stock (closed-grain hardwoods)
- Maple strips (approx. 1¼–1½″ / 32–38 mm wide), qty 5–6
- Walnut strips (approx. 1¼–1½″ / 32–38 mm wide), qty 4–5
- (Optional accent) Cherry strips (¾″ / 19 mm wide), qty 2
Tip: Favor tight-pored hardwoods—maple, walnut, cherry—for sanitary, durable surfaces. Avoid softwoods and open-pored, ring-porous species on the cutting face.
Best Wood Glue for Cutting Boards & Small-Shop Projects
Looking for a dependable, food-contact-safe glue that gives you stress-free panel glue-ups and tight seams? Meet our top pick.
Top Recommendation: Titebond III Ultimate Wood Glue
- Why it’s great: Long open time, strong waterproof bond (Type I), excellent sandability, and approved for indirect food contact—perfect for cutting boards, butcher blocks, and kitchenware.
- Who it’s for: Woodworkers making edge-grain cutting boards, furniture, jigs, outdoor pieces, or anyone who wants reliable, easy-to-clean squeeze-out.
Buy on Amazon:
Key Benefits (At a Glance)
- Longer open time: More relaxed panel assembly—especially helpful on cutting board glue-ups.
- Waterproof strength: Type I water resistance stands up to humid kitchens and splash-downs.
- Food-contact safe (indirect): A natural fit for boards finished with mineral oil and beeswax.
- Clean squeeze-out: Wipes with water before cure; cured glue planes/sands smoothly with the surface.
- Cold-weather friendly: Lower application temp than many PVAs—useful in unheated shops.
Why We Highly Recommend It
- Fewer “panic” moments: Extra open time lets you align strips, set cauls, and apply even clamp pressure without rushing.
- Professional-looking joints: Glue lines are tight and practically disappear after oil/wax finishing on maple/walnut boards.
- Finish-friendly: Once cured, it feathers nicely—no shiny ridges telegraphing through mineral oil or board butter.
- Versatile: Equally at home in casework, shop jigs, outdoor fixtures, and small crafts.
How to Use It for Cutting Boards (Step by Step)
- Prep edges: Joint/plane for straight, square glue faces. Vacuum dust—clean surfaces bond better.
- Apply a thin, even film: Coat both mating edges with a roller or brush. Even coverage beats heavy blobs.
- Clamp smart: Use moderate, balanced pressure (alternate top/bottom clamps). Aim for a light, continuous squeeze-out bead—don’t starve the joint.
- Scrape at gel stage: After ~20–30 minutes, shave off beads with a card scraper—no smearing into pores.
- Cure fully: Follow label times (cool shops need longer). Then flatten, sand, and finish as normal.
Pro Tips for Best Results
- Batch work: The forgiving open time is ideal when gluing multiple boards in a session.
- Temperature matters: Keep stock, glue, and shop near recommended temps for consistent strength.
- Sanding sequence: 80 → 120 → 180 → 220; raise the grain, then final scuff for a silky feel after the first wash.
- Finish pairing: Mineral oil followed by beeswax/carnauba board butter gives a durable, food-safe sheen.
Wood Glue Pros & Cons
Who Should Buy This
- DIYers needing a tough, dependable, finish-friendly PVA glue
- Cutting board makers (edge-grain and butcher-block builds)
- Small-shop furniture and cabinet makers
Best Conditioner for Cutting Boards & Small-Shop Projects
Want a food-safe finish that makes wood pop, repels water, and is dead-simple to maintain? This is the combo we trust.
Top Recommendation: USP Mineral Oil + Beeswax/Carnauba Board Butter
- Why it’s great: Mineral oil penetrates and hydrates fibers; beeswax/carnauba locks in that moisture and adds a satin, water-resistant barrier—ideal for cutting boards, butcher blocks, bowls, and utensils.
- Who it’s for: Makers and home cooks who want food-contact-safe care that won’t go rancid and is easy to reapply monthly.
Buy On Amazon:
Key Benefits (At a Glance)
- Food-contact friendly: Uses USP mineral oil and natural waxes commonly chosen for kitchen wood.
- Won’t go rancid: Unlike many plant oils, mineral oil is stable, odorless, and neutral over time.
- Hydrates + seals: Oil soaks in to prevent drying; waxes create a moisture-resistant top layer that buffs to a low-sheen glow.
- Easy maintenance: Quick wipe-on routine—perfect for customer care cards and repeatable shop workflows.
- Universally useful: Works on maple/walnut boards, butcher blocks, bamboo, wooden spoons, and salad bowls.
Why We Highly Recommend It
- Instant grain pop: One coat brings maple and walnut to life—great for photos and in-booth demos.
- Protective, not plasticky: You get water beading without a slick film that feels odd under a knife.
- Predictable care routine: “Oil monthly, then wax” is simple for customers—fewer support questions, better reviews.
- Widely available: Multiple reputable brands make this formula in convenient sizes (from small tins to shop-sized bottles).
How to Use It for Cutting Boards (Step by Step)
- Clean & dry: Hand-wash, then let the board air-dry fully standing on edge.
- Oil flood: Warm a little mineral oil and apply generously to faces and edges until absorption slows (15–20 minutes).
- Wipe excess: Buff off any standing oil with a lint-free cloth.
- Wax topcoat: Apply board butter (mineral oil + beeswax/carnauba). Let haze, then buff to a uniform satin sheen.
- Maintain monthly (or when dry): Increase frequency in arid climates or heavy use.
Pro Tips for Best Results
- Raise the grain first: After final sanding (180–220 grit), lightly dampen and re-scuff at 220 so the first wash stays silky.
- Warm the butter: Slight heat helps wax spread and penetrate evenly, especially on end grain.
- Seal end grain thoroughly: It’s the thirstiest; give it extra passes.
- Demo the beading: A quick water-drop test on a sample board converts browsers into buyers.
- Bundle it: Include a small tin and a care card with every board to lift average order value and reduce returns.
DIY Board Butter Recipe (Shop-Ready)
- 4 parts USP mineral oil
- 1 part beeswax
- ¼ part carnauba wax
Melt gently in a double boiler, stir until clear, pour into tins, and let cool. Label with simple directions: “Apply thin coat, let haze, buff.”
Pros & Cons
Who Should Buy This
- Cutting board makers (edge-grain and end-grain) who want a customer-friendly care system
- Home cooks with butcher blocks, bamboo boards, bowls, and wooden utensils
- Shops bundling a maintenance kit with premium boards for gifting
Optional Hardware & Add-ons
- WALRUS Oil – Cutting Board Feet (Black, 1/2″) — 4-Pack
Rubber bumper protectors reinforced with built-in metal washers; includes stainless screws. Good grip and a tidy, low-profile look for premium boards.(Quick install tip: Pre-drill pilot holes (e.g., #4 or #5 screw size per listing), place feet ~12–20 mm in from each corner, and keep them equidistant for a level, wobble-free board.)
- HOWTOOL – Utility Tray Pulls, 10-Pack, Oil-Rubbed Black (with screws) — bulk pack for batching boards/trays. Labeled “perfect for cutting boards, trays.” Quick install tips for a pro result: Pre-drill pilots sized to the screw core; keep handles ~20–25 mm in from corners for balance. On leather straps, use the included backing plate (or add a large washer) inside the board to distribute load and prevent tear-through. If your board is thicker/harder than typical, swap to longer stainless pan-head screws for full bite.
- SpeTool Juice Groove Router Jig (adjustable, up to ~25.6″ square) — aluminum frame with metric/imperial scales for precise offsets.
Quick tip for adjustable juice-groove jigs (frame-style):
- Center your template bushing to the bit (use a centering pin if you have one).
- Set the jig’s inset (common: ~9–10 mm / ⅜″ from the edge) and depth (start ~3–4 mm / ⅛″).
- Clamp the frame to the board on non-slip pads; confirm the opening clears your board evenly.
- Make a test pass on scrap of the same thickness to verify inset and depth.
- Route inside the frame counterclockwise (conventional cut) so the bit pushes the bushing into the guide—no wandering.
- Take two shallow passes instead of one deep cut; keep the router moving to prevent burns.
- For crisp end-grain, do a quick light climb nibble on each end-grain side first, then the full CCW pass.
- Vacuum chips, then (optional) make a final 0.5 mm clean-up pass for a glass-smooth groove.
Download 40 Free Woodworking Plans (Inside the book)
Packaging & Brand
- Kraft sleeve or cotton bag
- Printed care card
- Discrete brand/laser mark

Engraving Materials:
Metal: Including stainless steel (creates obvious patterns)
Glass: Surface engraving
Wood: All types for decorative burning
Acrylic: Clear and colored varieties
Most consumables: Wide range of everyday materials
Buy On Amazon
Tools Needed (Budget → Pro)
Table saw or track saw → Makita SP6000J1 6-1/2″ Track Saw Kit (with 55″ rail)
A precise, splinter-free cutter that handles sheet goods and long rips without wrangling a table saw. Variable speed and a true plunge make it great for straight-line ripping and breaking down hardwood.

12 AMP motor with variable speed control dial (2,000 – 5,200 RPM) for optimum performance in a variety of materials
Large cutting capacity (2-3/16″ at 90° and 1-9/16″ at 45°).
Buy On Amazon
Planer (or router sled) → DEWALT DW735X 13″ Thickness Planer
The small-shop standard: two feed speeds, easy knife changes, and strong chip ejection. Leaves boards ready for light sanding and keeps batches consistent.

Powerful 15 amp, 20,000 rpm motor (10,000 rpm cutterhead speed) handles larger cuts in wider materials with ease.
Buy on Amazon
Crosscut sled (square ends) → POWERTEC 71403 Table Saw Crosscut Sled
Out-of-the-box sled with fence, flip stop, miter bar, and fine graduations—nice upgrade over DIY when you want repeatability fast.

COMPLETE TABLE SAW SLED KIT – Includes MDF base (23-13/16”), MDF fence face, extruded aluminum fence, miter bar (3/8″ D x 3/4″ W), flip stop, hold-down clamp, installation hardware, wear strips, Allen key, screwdriver & instructions.
Buy on Amazon
4–6 parallel/pipe clamps → Jorgensen 24″ Cabinet Master Parallel Clamps (2-pack)
Parallel jaws distribute pressure evenly for flat panels and glue-ups; high clamp force and reversible heads add versatility.

JORGENSEN parallel clamps features a compact, industrial-grade steel bar that resists flexing under pressure—ideal for bench-top woodworking, furniture repairs, and cutting board assembly where even pressure matters.
Buy on Amazon
Wax paper / silicone mat under glue-ups → Gartful 23.6″×15.7″ Silicone Craft/Glue Mat
Non-stick, heat-resistant silicone that peels dried glue cleanly and protects your bench.
If you want an multipurpose silicone mat pad for arts & crafts projects (glue guns, make candles), mat for casting molds, epoxy resin jewelry casting molds mat, hot glue pad etc.
Buy on Amazon
Router (⅛–¼” round-over or chamfer) → Makita RT0701C Compact Router
Reliable trim router with smooth depth adjustment and variable speed—perfect for round-overs, chamfers, and finger-grip details.

Slim and ergonomically designed body for increased comfort and control.
Electronic speed control maintains constant speed under load
Soft start feature for smooth start ups
Buy on Amazon
Random-orbit sander → Bosch ROS20VSC 5″ ROS
A shop favorite for swirl-free finishes thanks to pad-dampening and variable speed; good dust collection, too.

SMOOTH FINISH: pad dampening system designed to eliminate swirl marks on both flat and contoured surfaces.
Buy on Amazon
Safety: Hearing protection → 3M WorkTunes Connect (Bluetooth)
Protects hearing and streams audio; long battery life with glove-friendly controls—great for long sanding sessions.

HELPS PROTECT YOUR HEARING: Helps provide hearing protection with a 26 dB Noise Reduction Rating (NRR)
BLUETOOTH TECHNOLOGY: Stay entertained on the job with Bluetooth wireless technology
Buy on Amazon
Safety: P100 dust protection → 3M 7502 Half-Face Respirator + 7093 P100 Filters
Comfortable silicone mask with P100 filters for fine dust from sanding and routing. (Buy mask and filters separately.)

You can have short product description here. It can be added as and enable/disable toggle option from which user can have control on it.
Buy on Amazon
See More: Makita XSH06PT 18V X2 LXT Brushless 7-1/4″ Circular Saw
Cut List & Yield Planning
For a finished 12″×18″×~1″ (305×457×25 mm) board, glue a panel slightly oversize (~12½″×18½″), then trim square. Rip consistent strips so glue lines close cleanly. Expect ~1.5–1.8 bd-ft hardwood per board (species/kerf/waste dependent). Batch plan: one 8′ board of 4/4 maple + one 8′ board of 4/4 walnut yields 3–4 mixed boards plus accent offcuts for coasters.
Step-by-Step Build (Production-Ready)
Step 1 — Select, Rip & Pattern (Flat Starts Here)
Lumber Selection
- Choose kiln-dried stock at 6–8% MC. Straight grain, no pith/knots/sap pockets along future glue edges.
- Joint one reference edge (or straight-line rip). A clean reference saves time later.
Rip & Thickness
- Rip strips 1¼–1½″ (32–38 mm) wide with a sharp 40–50T blade to minimize burn.
- Plane/sand both faces to matching thickness; uniform strips = flatter glue-ups.
Layout & Registration
- Dry-lay and audition patterns (e.g., maple–maple–walnut repeat; add cherry accents).
- Alternate growth rings (smiles/frowns) across the bundle to resist cupping.
- Mark registration triangles across the top; label L/R ends so order can’t drift.
- Wipe dust from glue faces—dust starves bonds and creates hairline seams.
Step 2 — Glue-Up That Stays Flat
Adhesive Film & Clamp Strategy
- Roll a thin, even glue film on both mating edges; aim for full wetting, not rivers.
- Load strips between clamps, alternating top/bottom every 150–200 mm to balance pressure.
Cauls & Alignment
- Add taped cauls across the top; they lock the pack in plane.
- Tighten to a modest continuous bead. Over-clamping = starved joints → future splits.
The 5-Minute Check
- At ~5 minutes, sight both ends; tap any proud strip flush while glue is still slippery.
- Scrape squeeze-out at gel stage (≈20–30 min). Don’t smear wet glue into pores.
Cold-shop note: Extend clamp time per adhesive spec; low temps slow cure.
Step 3 — Flatten, Square & Profile (Pro Details)
Flattening Options
- Planer/Drum sander: Light passes; flip every pass to relieve stress.
- Router sled: Shim to eliminate rock, take shallow climbs, then ROS to 120-grit.
Square & Size
- Joint one long edge → rip to final width → crosscut ends dead square (crisp ends sell).
- Leave an extra 2–3 mm perimeter if you’ll add a juice groove—trim clean after routing.
Profiles & Features
- Rout ⅛–¼″ round-over (top + bottom) or a small chamfer; break all arrises for comfort.
- Finger grips: shallow underside coves 4–5″ (100–125 mm) from each end.
- Handles/feet: mark consistent offsets; pre-drill; confirm screw length won’t telegraph.
- Juice groove: core-box bit, ~⅛–3/16″ deep, ⅜″ in from edge using a corner-radiused template.
Step 4 — Sand, Finish & Brand (Boutique Feel)
Sanding Discipline
- Progress 80 → 120 → 180 → 220 (→ 320 on walnut/cherry). Do not skip grits.
- Keep the ROS flat; avoid “tipping” at edges (creates waves).
- Use raking light to catch swirls before oil reveals them.
Raise the Grain
- Lightly dampen the surface; let dry; scuff at final grit. The board stays silky after first wash.
Food-Safe Finish
- Warm mineral oil and flood all faces/edges until absorption slows; wait 15–20 min; wipe dry.
- Buff board butter (mineral oil + beeswax + a touch of carnauba) to a satin glow.
- Optional feet: install now; ensure level, no rock.
Branding & Packaging
- Discreet brand/laser on edge or underside builds trust and repeat sales.
- Package with a care card and small butter tin—easy upsell and fewer support emails.
Mistakes to Avoid (And Fast Fixes)
- Wrong wood: softwoods/open-pored species stain, fuzz, and feel cheap.
- Starved joints: over-clamping or dry edges → micro-seams months later. Roll glue on both edges; moderate pressure.
- Skipping grain-raise: fuzz after first wash. Always pre-raise.
- Harsh edges: sharp arrises chip and feel unfinished; round or chamfer.
- Film finishes: thick glossy films aren’t ideal for knife work (and may not be food-safe). Stick to oil/wax.
- Deep groove on thin boards: weak edges. Keep grooves shallow and inset or skip on ¾″ stock.
- Cupping: unbalanced rings or uneven finishing. Alternate rings; oil/wax both faces; store flat.
Quality Control (QC) Checklist
- Flatness: ≤0.5 mm (≤.020″) across corners; no twist (check with winding sticks)
- Glue lines: tight, invisible after oil; no “ghosts” under raking light
- Edges: even round-over/chamfer; no burn marks or dips
- Ends: clean, square, no blow-out
- Branding: straight, consistent position; feet level; no wobble
Price & Profit (Realistic Numbers + Calculator)
Typical costs (12″×18″×~1″):
- Wood (1.5–1.8 bd-ft): €10–€14
- Glue/finish/abrasives/packaging/feet: €4–€6
- Materials: ~€15–€20
Labor (batched): 35–55 min/board across ripping, glue-up, flattening, profiling, sanding, finishing.
Retail targets:
- Maple/walnut standard (no groove): €55–€95
- Walnut-forward + groove + grips: €85–€120
- Upsells: groove +€10–€15, grips +€5–€8, engraving +€8–€15
Anchor pricing: keep one showpiece at €140+ to lift perceived value of the mid-tier.
Simple pricing formula:Retail = (Materials × 3) + (Shop rate × Hours) + Upsells
(Shop rate suggestion: €40–€60/hr for solo makers)
Margin booster: batch strips, standardize sizes, dedicate a sanding/finish station—+15–20% margin vs one-offs.
Where to Sell (Channel-Specific Tips)
- Craft & farmer’s markets: High weekend volume and gift traffic. Demo oiling hourly to draw a crowd.
- Gourmet shops/butcher counters: Wholesale consistent sizes with your brand mark; provide a small display and care cards.
- Etsy / Instagram Shops: Lifestyle photos with bread/fruit/herbs outperform plain shots. Use video (oil beading).
- Weddings/real-estate gifts: Offer “From the kitchen of …” engraving bundles and easy bulk ordering.
Selling Approach (Scripts That Convert)
- In-hand script: “Feel how the edges disappear in your palm—no sharp corners. Long-grain is knife-friendly, and a teaspoon of oil once a month keeps this glow.”
- Objection killer: “Dishwasher? Like all real wood, it’s hand-wash only—two minutes to rinse, dry, and stand on edge.”
- Personalization: “Edge initials while you browse—adds 10 minutes.”
- Bundle CTA: “Board + butter + care card saves you 10% and ships gift-ready.”
Photography, Listing & SEO (WordPress-Ready)
Featured image ideas: board at 45°, window light, herbs/knife for scale.
Detail shots: edge profile, groove, finger grips, thickness, branding, care kit.
Alt text examples:
- “Edge-grain maple and walnut cutting board with round-over edge and satin wax finish.”
- “Maple/walnut butcher block with optional juice groove and finger grips.”
Title tag: Making Edge Grain Cutting Board in Maple & Walnut – Handmade Butcher Block (12×18)
Meta description: Step-by-step guide to making edge grain cutting board projects: maple/walnut stripes, food-safe finish, juice groove, pricing, and selling tips.
Suggested slug: /making-edge-grain-cutting-board-maple-walnut
Tags: maple cutting board, walnut cutting board, edge-grain board, butcher block, food-safe finish, board butter, juice groove, handmade kitchen gift
Care & Use (Print on Your Card)
- Wash: quick hand wash, mild soap, warm water
- Dry: stand on edge; never soak
- Condition: mineral oil monthly (or when dry); wax and buff for water beading
- Never: dishwasher, microwave, or vegetable oils (can turn rancid)
- Refresh: light 220-grit scuff → oil → wax
Variations, Upsells & Services
- Minimalist: chamfered edge, no groove, no feet—clean modern look
- Carving model: juice groove + grips
- Long charcuterie: 8–10″ × 24″ with handle cut-out (great photo prop)
- Bundles: board + coaster set + butter tin; “Chef Set” (board + salt cellar + knife rack)
- Re-conditioning service: free quick oil at shows; paid sand/refresh by appointment
Troubleshooting (Real Shop Fixes)
- Twist after glue-up: plane/sled one light face → flip → repeat; if extreme, rip down the center, joint, re-glue.
- Seam shadow after oil: it’s glue smear; scrape to clean wood and re-sand 180→220.
- Burn marks from routing: take lighter passes; clean/rotate bit; slow feed/speed balance.
- Micro-chipout on ends: score with a knife, use a zero-clearance sled, take a kiss pass.
Best Wishes,
Alexander.


Leave a Reply
You must be logged in to post a comment.