How to Make a Charcuterie Board Out of Wood (Food-Safe, Beginner-Friendly)
A wooden charcuterie board is the perfect weekend project—fast, affordable, and beautiful. This end-to-end guide shows how to make a charcuterie board out of wood with clear sizes, smart wood choices, a food-safe finish, and pro tips for sanding, care, and long-term durability. Printable templates are included to make layout effortless.
See all Popular 38 Projects For Making an Extra Sale Woodworking
Table of Contents
Printable Templates (Full-Size, A4 Tiled)
(Discover templates at the end of this article)
- Rectangle 12×18 in (304.8×457.2 mm)
- Oval 12×20 in (304.8×508.0 mm)
- Paddle 6×20 in with lanyard hole (152.4×508.0 mm)
Print at 100% / Actual Size. Align registration marks and the light 25 mm grid when taping pages together.

What Makes a Great Wooden Charcuterie Board
- Tight-grain hardwood (maple, walnut, cherry, beech) for a smooth, hygienic surface
- Comfortable edges that feel great in hand and won’t chip easily
- Food-safe finish—mineral oil plus beeswax “board butter” for a rich, easy-to-refresh sheen
- Right size & thickness for the way you serve
Best Wood for a Charcuterie Board
Choose closed or tight-grain hardwoods that sand silky and clean easily:
- Hard Maple — pale, neutral canvas that makes food colors pop
- Walnut — rich, dark tone with a premium look and feel
- Cherry — warm color that deepens into a classic kitchen patina
- Beech — fine, even grain; budget-friendly and easy to finish
Notes:
Open-pore woods like red oak can trap colors and moisture if you cut heavily on them. Use for serving only and keep them well finished. Avoid strongly aromatic/exotic species that can transfer scent.
Ideal Sizes & Thickness (Imperial + Metric)
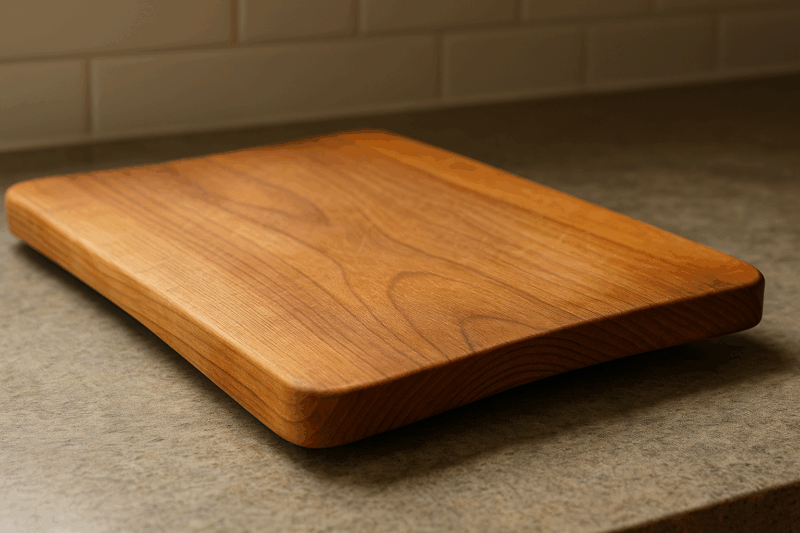
- Everyday rectangle: 12 × 18 in (30 × 45 cm), ¾–1 in thick (19–25 mm)
- Party spread: 16 × 22 to 18 × 24 in (40 × 55 to 45 × 60 cm), ⅞–1 in (22–25 mm)
- Slim paddle: 6 × 20 in (15 × 50 cm) with 4–5 in (10–13 cm) handle
- Oval: 12 × 20 in (30 × 50 cm), ¾ in (19 mm) thick
Tip: If you’ll add rubber feet, aim near 1 in (25 mm) for a substantial, warp-resistant feel.
Materials
- Hardwood blank (maple, walnut, cherry, or beech)
- Masking tape & pencil (layout)
- USP/food-grade mineral oil
- Board butter (beeswax + mineral oil; recipe below)
- Optional: Titebond III (if laminating strips), rubber feet + short screws, leather cord for a lanyard
Tools
- Circular or track saw (straight cuts)
- Jigsaw or bandsaw (curves/handle)
- Random-orbital sander + discs: 80 / 120 / 180 / 220
- Router with ⅛–¼ in (3–6 mm) roundover bit (optional)
- Drill + ⅜ in (10 mm) bit (lanyard hole)
- Clamps, raking light, lint-free rags
See also Makita 18v lxt cordless circular saw xss02z product info and reviews
Safety First
- Wear eye, ear, and dust protection; use a respirator while sanding.
- Clamp securely before cutting or routing.
- Avoid cooking oils that go rancid—use mineral oil or a fully cured, food-contact-suitable topcoat.
Step-By-Step: How to Make a Charcuterie Board Out of Wood
1) Select & Mark the Blank
Choose a flat board free of twist and deep checks. Apply masking tape where you’ll cut and trace a template (rectangle, oval, or paddle). Tape gives crisp pencil lines and protects the surface during layout.
2) Cut to Size & Rough Shape
Crosscut and rip to final size with a circular or track saw. For curves and handles, cut just outside the line with a jigsaw or bandsaw—leaving material to sand to perfection.
3) Refine the Profile & Soften the Edges
Sand or rasp exactly to the line for a clean silhouette. Add a ⅛–¼ in roundover with a router, or hand-sand a gentle bevel. Drill a ⅜ in (10 mm) lanyard hole near the handle end and lightly chamfer the rim.
4) Progressive Sanding (Silky Surface)
Sand faces and edges in sequence: 80 → 120 → 180 → 220.
Use raking light to spot scratches before moving up grits. Lightly raise the grain with a mist of water, let dry, then final-sand at 220 for that satin, uniform feel.
5) Apply a Food-Safe Finish
Flood the surface with USP mineral oil; allow 15–30 minutes to soak.
Reapply until the wood stops absorbing, then wipe off excess. After ~30 minutes, buff a thin coat of board butter for added water resistance and a warm, hand-rubbed glow.
6) Cure, Buff & Add Hardware
Let the board rest overnight. Give a final buff with a clean cloth.
Optional: pre-drill and install rubber feet to keep the board stable and allow airflow; thread a leather cord through the lanyard hole for easy hanging.
DIY Board Butter (Beeswax + Mineral Oil)
- Ratio: 5 parts mineral oil : 1 part beeswax (by weight)
- Method: Melt beeswax gently in a double boiler, stir in warm mineral oil, pour into tins, and let cool.
- Use: Rub on a thin coat, let haze, then buff with friction for a durable, food-safe sheen.
Optional: Laminated (Striped) Charcuterie Board
- Rip strips of contrasting species (e.g., walnut + maple) 1–2 in (25–50 mm) wide.
- Glue-up with Titebond III; alternate clamp positions top/bottom for even pressure.
- Scrape squeeze-out after initial set; let cure fully.
- Flatten by planing or sanding; then follow the shaping, sanding, and finishing steps above.
Live-Edge Charcuterie Board (Serving Showpiece)
- Remove all bark; sand the cambium layer smooth.
- Consolidate soft spots if needed; keep edges comfortable to the touch.
- Finish as usual. Pair with a leather strap and low-profile rubber feet.
Cleaning, Care & Maintenance
- After serving: hand-wash with warm soapy water, rinse, and dry standing on edge.
- Never: soak or dishwash—heat and steam cause movement and finish failure.
- Re-oil schedule: weekly for the first month, then monthly or whenever the surface looks dry.
- Refresh odors/stains: scrub with coarse salt + half a lemon, wipe clean, dry, and re-oil.
- Storage: avoid direct sunlight and heat vents.
Sanitizing option: Wipe with a mild kitchen-safe sanitizing solution after raw-protein contact; dry promptly, then re-oil if the surface looks dull.
Troubleshooting
- Warping/cupping: store on edge with airflow; add rubber feet. Light cup can be sanded out across high spots.
- Fuzzy feel after first wash: let dry fully, scuff with 220, re-oil, then wax.
- Visible glue lines (laminations): scrape, sand flat, refinish; next time clamp evenly and remove squeeze-out early.
- Blotchy finish: you advanced grits too soon or left dust. Re-sand 180 → 220, oil, then apply a thin coat of board butter and buff.
Serving Ideas That Photograph Beautifully
- Color contrast: pale maple makes berries and herbs pop; walnut makes cheeses glow.
- Texture mix: soft + firm cheeses, charcuterie, crackers, nuts, dried fruit, olives, honey, fresh herbs.
- Layout flow: place bowls/wedges first, fan sliced meats/cheese next, fill gaps with grapes and nuts.
- Final touch: a quick buff with a clean cloth right before serving.
FAQ
What wood is best for a charcuterie board?
Hard maple, walnut, cherry, and beech—tight grain, smooth finish, and easy maintenance.
Can I use oak?
Yes for serving when sealed; its open pores can hold color and moisture if you cut heavily on it.
What’s the safest finish?
USP/food-grade mineral oil followed by beeswax board butter—easy to refresh and gives a natural, food-safe surface.
How thick should the board be?
¾–1 in (19–25 mm) feels solid. If you’ll add feet, aim closer to 1 in (25 mm).
How long before it’s ready to use?
After oil and wax, let the board rest overnight. Wipe any weeping oil before loading with charcuterie.
Can I cut on my charcuterie board?
Light slicing is fine, but these shine as serving boards. Build an edge-grain or end-grain cutting board for daily chopping.
Quick Build Recap
- Choose a tight-grain hardwood (maple, walnut, cherry, beech).
- Print a full-size template and trace it on your board.
- Cut to shape; refine the profile; round over or bevel edges.
- Sand 80 → 120 → 180 → 220; raise the grain; final-sand at 220.
- Saturate with mineral oil; buff with beeswax board butter.
- Cure overnight, then add rubber feet and a leather lanyard if desired.
Enjoy your handcrafted DIY wooden charcuterie board—a fast, satisfying build that looks stunning on any table.
Download Printable Charcuterie Board Templates
How to Print and Use the Charcuterie Board Templates (A4 Tiled, 1:1 Scale)
These templates (rectangle 12×18″, oval 12×20″, and paddle 6×20″ with lanyard hole) are designed to print full-size on any home or office printer using A4 paper. Follow this quick guide to get a perfect, traceable outline for your wooden charcuterie board.
What’s in each PDF
- True 1:1 outline of the board shape
- Registration marks at the page corners for easy alignment
- A light 25 mm grid across pages to help taping
- Calibration squares: one 25 mm box and one 1-inch box to verify scale
Step-by-step printing & assembly
- Download & open the PDF for your shape (rectangle, oval, or paddle).
- In your print dialog, choose Actual size / 100% / No scaling.
- Disable “Fit to page” or “Shrink to fit.”
- Print on A4 paper. If borderless printing is available, leave it off (the files already account for standard margins).
- Verify scale: measure the calibration squares.
- The 25 mm box should measure exactly 25 mm; the 1-inch box should measure 1 inch (25.4 mm).
- If not exact, reprint with scaling set to 100%.
- Trim and tape: cut off margins where needed and align registration marks and grid lines across pages. Tape from the back to keep the front smooth.
- Cut out the template along the bold outline with scissors or a hobby knife.
Transfer template to wood
- Place the paper template on your hardwood blank (maple, walnut, cherry, or beech).
- Trace the outline with a sharp pencil; mark the lanyard hole location on the paddle template.
- Cut just outside the line with a jigsaw/bandsaw, then sand to the line for a clean profile.
- Soften edges with a roundover or bevel, sand 80→120→180→220, and finish with USP mineral oil + beeswax board butter.
Tips & troubleshooting
- Printer shrank it: recheck that “Scale” is 100% and “Fit to page” is off.
- Faint lines: set printer quality to “Fine/High” or use a darker paper setting.
- Template slips: use painter’s tape or a light spray adhesive to hold it flat while tracing.
- Custom sizes or US Letter: ask for a resized or US Letter version and print the same way (100% scale).
That’s it—print, tape, trace, and you’re ready to build a beautiful wooden charcuterie board with confidence.
Best Wishes,
Alexander.


Leave a Reply
You must be logged in to post a comment.