How to Build a Farmhouse Coffee Table for Beginners – Complete DIY Guide
Are you searching for how to build a farmhouse coffee table for beginners? If yes, you’re not alone. Coffee tables are one of the most popular woodworking projects, and farmhouse-style tables are especially trendy because of their rustic charm, timeless appeal, and practicality.
Related: How to build a bench seat
This comprehensive woodworking tutorial will walk you through everything you need to know:
- Tools and materials required
- Step-by-step building instructions
- Pro tips for finishing and styling
- Mistakes beginners often make and how to avoid them
- Cost and time breakdown
- FAQ answers
By the end of this guide, you’ll not only know exactly how to build a farmhouse coffee table for beginners but also how to make it look professional—even if it’s your first big DIY project.

Table of Contents
Why a Farmhouse Coffee Table Is Perfect for Beginners
Farmhouse coffee tables are a dream project for novice woodworkers because:
- Simple construction – The design is straightforward, usually made with 2×4 and 2×6 lumber.
- Beginner-friendly joinery – You won’t need complicated mortise and tenon joints; screws and pocket holes are enough.
- Customizable – You can adjust dimensions, finishes, or add a bottom shelf depending on your style.
- Low cost – Building your own rustic farmhouse table often costs less than $100.
If you’re wondering how to build a farmhouse coffee table for beginners without spending months learning advanced techniques, this is the ideal project.
Tools You’ll Need
You don’t need a fully stocked workshop. With just a few essential tools, you can build your farmhouse coffee table:
- Circular saw or miter saw (for accurate cuts)
- Drill and driver set
- Carpenter’s square & measuring tape
- Clamps (to hold boards while gluing/screwing)
- Orbital sander
- Pocket hole jig (optional but highly recommended)
Tip: If you don’t own some of these tools, consider borrowing from a friend or buying one on Amazon.
Recommended Circular saw:

DEWALT 7 1/4 circular saw is among the lightest saws in its class.
Buy Now On Amazon
Materials List
Here’s a sample cut list for a 48″ × 24″ × 18″ farmhouse coffee table (adjustable to fit your space):
Having materials ready before starting will make the process smoother. – gather everything first so you can build in one session without stopping.
2×4 lumber for legs and frame – used to build the main base structure so the table is strong and stable.
2×6 boards for tabletop – wider boards that create the thick, rustic farmhouse-style top.
1×4 slats if you want a bottom shelf – optional boards to add a storage/display shelf under the table.
2½″ wood screws or pocket hole screws – fasteners for joining the frame, legs, and supports securely.
Wood glue – adds long-term strength to joints so the table doesn’t loosen over time.
Sandpaper (80, 120, 220 grit) – for smoothing rough cuts, leveling the top, and prepping for finish.
Stain, chalk paint, or clear finish – the final look/protection layer, depending on whether you want rustic, painted, or natural.
Step-by-Step: How to Build a Farmhouse Coffee Table for Beginners
Step 1: Measure and Cut Lumber
- Decide on final dimensions. A beginner-friendly size is 48″ long × 24″ wide × 18″ high.
Before you cut anything, double-check the space where the table will live—measure your sofa height, walking clearance, and rug placement. If your couch is higher, you can add 1–2″ to the table height so it doesn’t look sunken. You can also shorten the length to 42″ for small living rooms or go up to 54″ for sectional setups. Write your final measurements on a cut list so you don’t forget mid-build. Good planning here keeps the whole “how to build a farmhouse coffee table for beginners” process stress-free. - Cut all 2×4s for legs and frame.
Mark all cuts with a sharp pencil and use a speed square to get crisp, accurate 90° lines—angled or sloppy cuts are the main reason beginner tables wobble. Cut the four legs first so they’re exactly the same length; stack them and trim if needed. Then cut the long aprons (for the longer sides) and the short aprons (for the 24″ ends). Label everything as you go—“leg,” “long apron,” “short apron.” Organized pieces speed up assembly and reduce mistakes. - Cut 2×6s for tabletop planks.
These boards will form your rustic top, so pick straighter boards from the lumber pile and avoid ones with big twists. If your table length is 48″, cut all tabletop boards to exactly 48″ so they line up cleanly when you glue. If you want decorative overhangs, you can cut them 1″ longer and trim later. Lay them out in order to see grain direction and color tone. This small step makes your table look intentional, not random. - Accurate measuring is crucial in how to build a farmhouse coffee table for beginners because small errors can create uneven legs or misaligned tops.
Always use the same tape measure for the whole project—different tapes sometimes vary by a hair. Measure twice, cut once, and don’t eyeball angles. A 1/8″ mistake on the frame becomes a 1/4″ gap on the tabletop. Use a stop block if you’re cutting several boards the same length. The cleaner your lumber prep, the easier every later step becomes—especially attaching the top and keeping the base square.
Step 2: Build the Frame
- Attach apron boards (the horizontal supports) to the table legs using wood screws or pocket holes.
Pocket holes (Kreg-style) are ideal for beginners because they pull joints tight and hide screws inside the frame. Pre-drill everything to prevent splitting, especially on the ends of 2×4s. Place aprons about 3–4″ down from the top of the legs so the tabletop can sit on the frame later. Use wood glue on every joint—it adds a ton of strength. Wipe away squeeze-out with a damp rag so you don’t have to sand hardened glue later. - Ensure all corners are square using a carpenter’s square.
This is the step almost everyone wants to rush, but don’t. Lay the frame flat on the floor or workbench and check each corner. If a corner is out of square, lightly clamp and adjust before the glue sets. You can also measure diagonals from corner to corner—if both diagonals match, your frame is square. A square frame means the tabletop will sit flat and the legs won’t splay out weirdly. - This frame forms the skeleton of your farmhouse coffee table.
Think of this like the foundation of a house—if the base is strong, everything else is easier. A solid frame prevents racking (side-to-side movement) over time. Even if you plan to add fancy X-braces or a lower shelf, this main rectangle is doing most of the structural work. Take your time here and you’ll end up with a table that doesn’t creak, twist, or go wobbly when someone puts their feet up.
Step 3: Add Support or Shelf
- Add cross braces to prevent wobbling.
Long, skinny tables sometimes flex if they don’t have something tying the sides together. Add a 2×4 or 1×4 stretcher across the middle of the frame. You can run it the long way (48″) or the short way (24″), depending on your design. Secure it with pocket screws or toe-screws from underneath. This one piece can make the difference between a “kinda okay” coffee table and one that feels store-bought solid. - If you’re including a bottom shelf, attach 1×4 slats evenly across the frame.
First, add cleats or support strips along the inside of the lower frame so the shelf boards have something to sit on. Then cut your 1×4s to length and space them evenly, leaving small gaps (⅛–¼″) for a farmhouse look. You can mix board widths—1×4, 1×6—for a rustic vibe. A lower shelf is great for baskets, blankets, or kids’ toys, and it visually fills the empty space between legs. - This step adds strength and visual appeal.
A table with just four legs can look a little plain. Adding a shelf, stretcher, or decorative brace gives it more weight and makes it look intentional, like a piece you’d see on Pinterest. Structurally, it ties the legs together so they don’t move independently. Visually, it gives you styling opportunities—put plants, trays, books, or woven baskets to complete the farmhouse aesthetic.
Step 4: Assemble the Tabletop
- Arrange 2×6 planks side by side.
Lay them out on a flat surface and test-fit the layout before gluing. Flip boards end-to-end to match grain direction or color so the top looks unified. If one board has a rounded edge, put that to the outside or plane/sand it later. Make sure you have enough width to cover the frame with a little overhang—usually 1″ on each long side looks good for farmhouse style. - Apply wood glue along edges.
Run a thin, continuous bead along the mating edges—too much glue will squeeze out everywhere and create a mess, too little and the boards won’t bond well. Use a brush or your finger to spread it for full coverage. Wood glue is actually stronger than the wood itself when cured, so don’t skip it just because you’re also using pocket screws. Wipe excess while it’s still wet. - Clamp tightly and secure with pocket screws from underneath.
Clamps keep boards flat and aligned while the glue dries. If you don’t have long clamps, you can clamp in sections or use ratchet straps. Then, from the underside, drive pocket screws across the seams to pull everything together. This keeps the top flat and prevents future gaps as the wood moves. Let it dry fully according to the glue instructions before sanding or attaching. - A solid tabletop is key when learning how to build a farmhouse coffee table for beginners—don’t rush gluing and clamping.
Most beginner projects look “homemade” because the top has uneven seams or cupped boards. Taking an extra 20–30 minutes here will give you that smooth, single-slab look. If a board sits higher than the others, clamp it down or add a caul (a straight board) across the top to level it. Once it dries, small height differences can be sanded away easily.
Step 5: Sand Smooth
- Start with coarse 80-grit sandpaper.
This first pass is about flattening, not polishing. Sand across joints, remove glue squeeze-out, and knock down mill marks from the lumberyard. Use an orbital sander if you have one—your arms will thank you. Keep the sander moving to avoid swirl marks. If you see dried glue, scrape first, then sand. - Move up to 120, then finish with 220.
Grit progression matters. Jumping straight from 80 to 220 often leaves scratches behind. 120 removes 80-grit scratches, and 220 gives you that touchable, furniture-grade feel. On legs and frame, you can stop at 150 if you’re painting. On a stained tabletop, go to 220 so the finish goes on even. Always sand in the direction of the grain on your final pass. - Round sharp edges slightly for safety and comfort.
A tiny 1/8″ roundover—done with sandpaper or a router—makes the table feel more “finished.” Sharp edges chip faster, especially on softwoods like pine. Rounded edges are also safer for kids and more comfortable for knees. Don’t overdo it, just break the edge so it looks worn-in like classic farmhouse furniture. - A smooth surface ensures stain or paint looks flawless.
Stain exaggerates scratches and glue spots, and paint highlights dents. Running your hand over the surface is the best test—if you feel bumps, keep sanding. Wipe down the whole table with a tack cloth or damp rag to remove dust before finishing. Dust in the finish is one of the top beginner complaints, but it’s totally avoidable.
Step 6: Attach the Top
- Place the tabletop centered on the frame.
Flip the top upside down, then set the base upside down on it. This way you can line up the overhang perfectly on all sides. Measure from leg to edge on both ends to make sure it’s centered. If you’re building multiple tables, you can even make a simple jig to speed this up. - Screw from underneath to avoid visible hardware.
Use 2–2½″ wood screws through the aprons into the underside of the tabletop. Predrill so the top doesn’t split. If you want to allow for seasonal wood movement, you can use figure-8 fasteners or pocket holes instead. Hidden fasteners give your farmhouse coffee table that clean, high-end look. - Check that the overhang is even on all sides.
A 1″ overhang on the long sides and ½–1″ on the short sides is a classic proportion. Uneven overhang is one of those tiny things people notice, even if they can’t say what’s wrong. If something is off, loosen the screws and adjust before tightening everything down for good.
Step 7: Apply Finish
- Dark walnut stain – Classic farmhouse look.
This color makes inexpensive pine look richer and ties in with other rustic furniture. Apply with a rag or brush, let it sit for a few minutes, then wipe off excess in the direction of the grain. You can do a second coat for a deeper tone. Pair it with a matte or satin topcoat so it doesn’t look plastic. - Whitewash or chalk paint – Shabby chic style.
Perfect if you want a lighter, airy farmhouse vibe. You can paint the base white and stain the top dark for the popular two-tone look. Lightly distress the edges with 220-grit after painting to reveal wood underneath. Seal chalk paint with a clear poly or furniture wax so it can handle drinks and feet. - Natural clear finish – Minimalist design.
If you love the grain, don’t cover it—just seal it. Use a water-based poly for a non-yellowing finish or an oil-based one for a warmer tone. Three light coats with sanding between them will give you a professional surface. This option works great if you used nicer lumber or reclaimed boards. - Always apply multiple coats for durability.
Coffee tables take abuse—drinks, feet, trays, kids playing. One coat is rarely enough. Do 2–3 thin coats, letting each dry fully. Lightly sand between coats to knock down dust nibs. A well-sealed surface will resist water rings and be easy to clean.
Advanced Options for Customization
- Adding metal corner brackets for an industrial vibe
This is a fast way to make a simple beginner build look like a store-bought piece from a farmhouse décor shop. Black or oil-rubbed bronze brackets pop against stained or painted wood. Install them after finishing so you don’t have to tape around them. They also add a bit of extra rigidity to the frame. - Creating an “X” crossbar design for the base
The X-detail is very “modern farmhouse” and looks harder than it is. Cut two 1×4 or 2×2 pieces, lay them diagonally, and trim the overlap in the middle. Attach with screws and glue. Paint it white and stain the top for a Magnolia-style piece. - Installing casters to make the table mobile
Great for small spaces or if you like to move furniture around for cleaning. Choose low-profile casters so the table doesn’t get too tall. You can even hide them slightly behind a skirt board. Locking casters will keep the table from sliding when you put your feet on it. - Using reclaimed barn wood for extra character
Swap the 2×6 top for reclaimed boards and you instantly get patina that can’t be faked. Just be sure to check for nails before cutting or planing. Clean and sand lightly to keep the aged look. Pair reclaimed wood with a clean white base to balance old and new.
Cost and Time Breakdown
- Cost: $50 – $120 (lumber + hardware + finish)
The lower end assumes pine, standard screws, and a simple stain. The higher end is if you buy nicer boards, pocket hole hardware, and premium topcoats. You can save by using offcuts or reclaimed wood for the shelf. Even at $100, this is way cheaper than buying a farmhouse coffee table at retail. - Time required: 1–2 days, depending on drying time for finishes
Actual building time is only a few hours, especially if you cut and assemble in one sitting. Most of the waiting is for glue and stain to dry. Do the build on Day 1 and finishing on Day 2. Beginners should not rush finish drying—it’s what makes the project look pro. - Skill level: Beginner
Cuts are straight, joinery is simple, and mistakes are easy to hide with farmhouse style. It’s a perfect “first real furniture” project because you’ll learn measuring, framing, gluing, sanding, and finishing—the core of woodworking.
Mistakes Beginners Should Avoid
- Not checking for square – Misaligned legs = wobbly table.
A table can look great but still rock if the frame or legs aren’t square. Check as you go instead of trying to “fix” it at the end. Use clamps to pull joints tight. If your floor is uneven, test the table on a known-flat surface like a workbench. - Skipping sanding steps – Leads to blotchy finishes.
Sanding is not the fun part, but it’s what separates DIY from “Whoa, you built that?” If you skip from rough to finish, the stain will soak unevenly. Always knock down glue, always sand with the grain, always remove dust before finishing. - Using untreated wood outdoors – Always seal if table will be outside.
This design is meant for indoors. If you want it on a porch or patio, use exterior-grade finish, outdoor screws, and ideally a more weather-resistant wood. Otherwise, you’ll get warping, cracking, and peeling finish in one season. - Overtightening screws – Can split lumber.
Pine and spruce are soft. If you drive screws too hard, especially near the ends, they’ll split. Predrill, use proper screw length, and stop when the joint is snug. If something splits, glue and clamp it right away.
Safety Tips
- Always wear safety glasses while cutting.
Even a small splinter or wood chip can cause eye injury. Glasses are cheap—eyes aren’t. Wear them any time you cut, drill, or sand. - Clamp boards before drilling or sanding.
Moving boards cause crooked holes and can pinch the drill bit. Clamping lets you use two hands on the tool, which is safer and more accurate—especially for beginners. - Work in a ventilated area when staining or painting.
Finishes can have strong fumes. Open windows, use a fan, or work in a garage with the door open. Read the can—some products specifically say “use with ventilation.” Don’t rush this step just to finish faster. - Keep a dust mask handy—sawdust is no joke.
Sanding creates fine dust that’s easy to breathe in. A simple mask or respirator protects your lungs. Also vacuum or sweep between steps so dust doesn’t get into your finish.
Styling Your Farmhouse Coffee Table
Add a jute rug underneath.
Natural textures pair beautifully with farmhouse wood tones. A neutral rug grounds the table and makes even a budget build look like it belongs in a magazine photo. To go deeper, choose a rug that’s slightly larger than the table so the legs sit fully on it — this frames the piece and makes the room look bigger. Jute, sisal, and other natural fibers add warmth without stealing attention from the table. If your table is light, pick a slightly darker rug for contrast. If you have pets, go for a chunky weave that hides dirt.
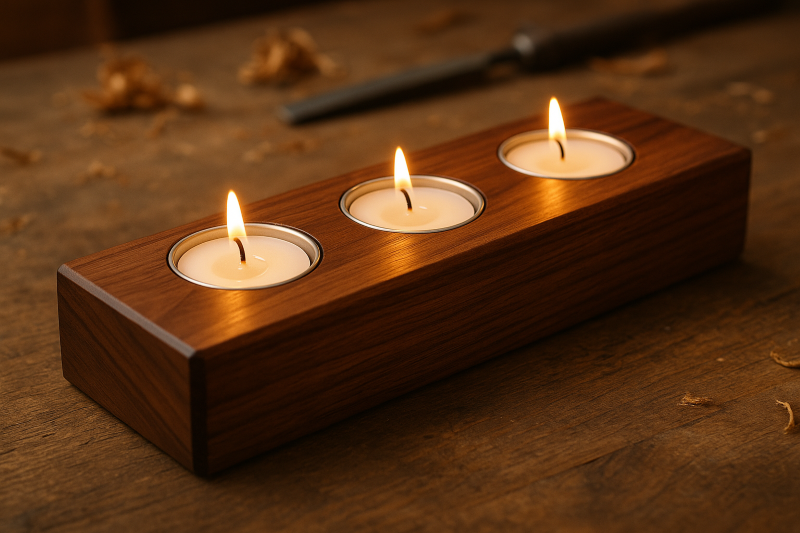
Place a tray with candles and books.
Trays make surfaces look styled, not cluttered. Use a wooden or metal tray, add a candle, a plant, and a woodworking or décor book. Instant cozy. The trick is to style in odd numbers — three or five items look intentional. Mix heights too: a low candle, medium plant, and taller book stack. Swap the candles for a seasonal item when holidays come. If you actually use the table daily, keep the tray movable so you can clear space fast for coffee, laptops, or board games.
Use seasonal décor—pumpkins in fall, flowers in spring.
The great thing about farmhouse style is it’s mix-and-match. Swap in eucalyptus, Christmas greenery, or baskets as seasons change. Your table becomes a décor centerpiece, not just a place to drop remotes. In fall, layer mini pumpkins, plaid napkins, and a copper mug for warm vibes. In winter, add pinecones and a knit runner. Spring loves tulips, lavender, or faux stems in a white ceramic jug. Summer can be super simple — a bowl of lemons or a woven basket. Rotating décor keeps the room fresh without rebuilding the table every time.
FAQs on How to Build a Farmhouse Coffee Table for Beginners
Is this project beginner-friendly?
Absolutely. Straight cuts, simple frame, pocket-hole joinery, and forgiving farmhouse style make it perfect for first-timers. Plus, it teaches you 90% of what you’ll need for future farmhouse benches, console tables, or TV stands.
Can I build this table without power tools?
Yes, but expect it to take longer. A hand saw, hand drill, and sanding block will get the job done, but cuts may not be as crisp. If you can borrow or rent a miter saw and orbital sander, the whole project becomes way faster and cleaner—totally worth it.
What wood is best for beginners?
Pine, construction 2×4s, and common whitewood boards are inexpensive and forgiving. They dent easier, but they cut and sand easily, and stain well if pre-conditioned. Save hardwoods for later builds.
How long will it last?
With solid joinery, glue, and a good topcoat, this kind of table can easily last many years indoors. Avoid standing water, recoat if the finish wears, and don’t drag it across rough floors.
Final Thoughts
Learning how to build a farmhouse coffee table for beginners is an empowering project that combines functionality, creativity, and affordability. You’ll gain woodworking confidence while producing a beautiful piece of furniture for your home.
Take your time, measure carefully, and enjoy the process. By following these steps, your finished table will not only serve as a practical addition to your living room but also as a proud showcase of your new woodworking skills.
Best wishes,
Alexander.


Leave a Reply
You must be logged in to post a comment.