How to Make a Charcuterie Board (for Beginners)
Print, trace, cut, sand, finish. Grab 3 printable templates—12×18" rectangle, 12×20" oval, and 6×20" paddle with lanyard hole—plus a quick-start build & finishing guide.
- Letter & A4 printing, full-scale outlines
- Step-by-step sanding & finishing checklist
- Tool-light: jigsaw + sander (router optional)
- Food-safe finishing recipes included
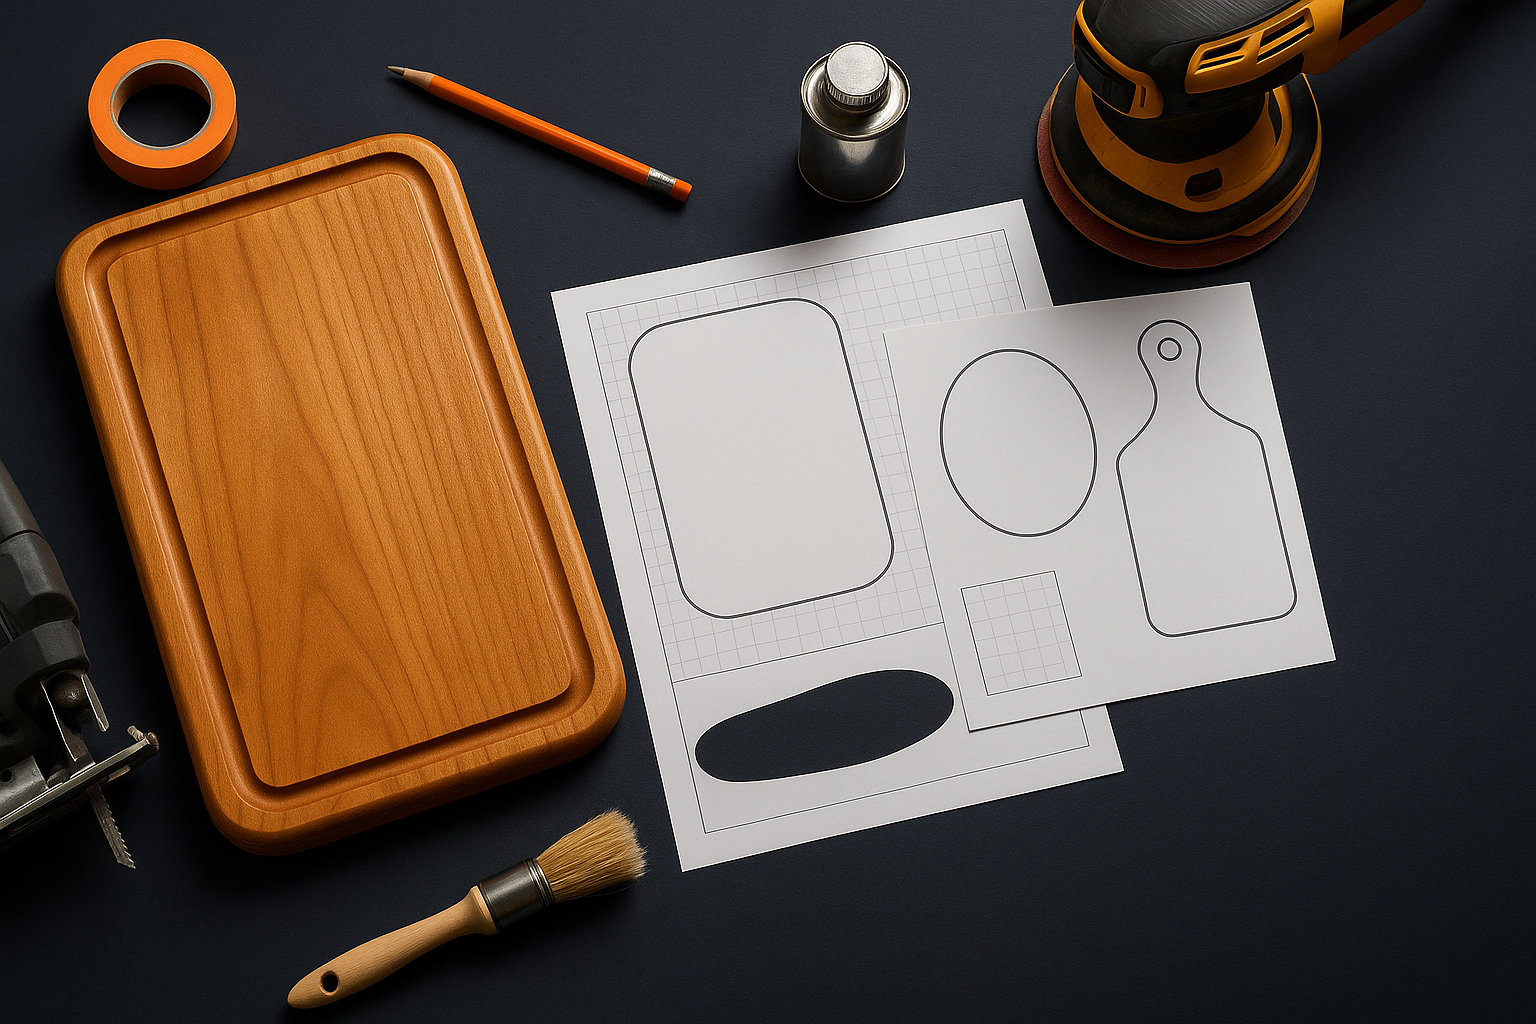
3 Printable Templates (PDF)
Full-scale outlines for 12×18" rectangle, 12×20" oval, and 6×20" paddle with lanyard hole. Print on Letter/A4 and tape if needed.
Beginner Build Guide
Step-by-step with photos, curve-sanding tips, and edge-easing options—hand tools or router.
Food-Safe Finish Recipes
Mineral oil schedule and a simple board butter (oil + beeswax/carnauba) for a durable sheen.
By signing up you’ll receive helpful woodworking emails. No spam. Unsubscribe anytime.
FAQ
Is this really free?
Yes. Enter your email above and we’ll send the download link to your inbox so you can access updates later.
What wood should I use?
Closed-grain hardwoods like maple, cherry, or walnut. Avoid open-pore woods (oak, ash) for food boards.
Which finish is food-safe?
Pure mineral oil followed by board butter (mineral oil + beeswax/carnauba). Re-apply when the surface looks dry.
Do I need a router?
No—round the edges by hand if you don’t have a router. Sand a small bevel (chamfer) or use a sanding block to soften edges.