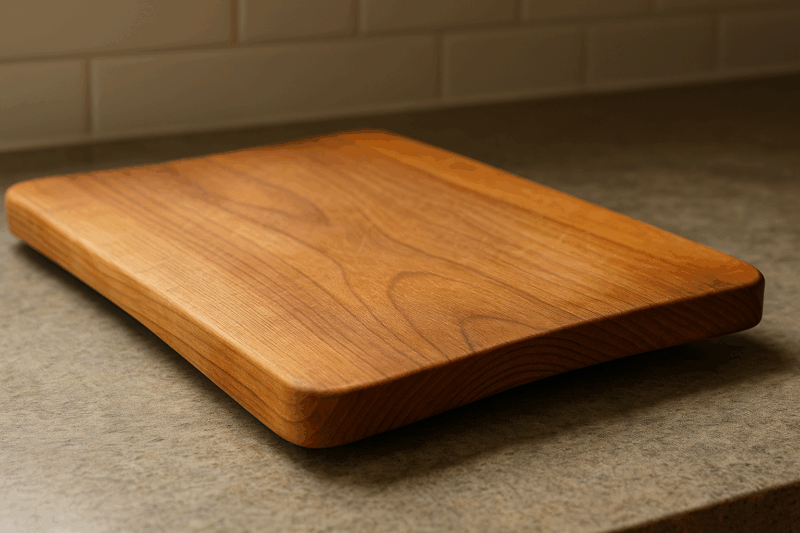
A wooden cutting board is more than just a kitchen accessory—it’s a daily workhorse, a serving piece, and for many woodworkers, a popular product to sell online. But raw wood is vulnerable: it absorbs moisture, harbors odors, and can crack without protection. That’s why every maker asks the same question: what is the best food safe finish for cutting boards step by step?
This guide explores every proven method, explains the science behind food-safe finishes, and lays out clear, actionable steps so your boards look professional, last longer, and remain completely safe for food contact.
Table of Contents
Why a Food-Safe Finish Matters
Wood fibers are like tiny drinking straws—they soak up liquid, which leads to swelling, stains, and warping. Without treatment, boards dry out and split. Applying a finish does three essential jobs:
- Seals the surface against moisture.
- Conditions fibers to prevent cracking.
- Highlights the grain for visual appeal.
Because cutting boards are direct food-contact items, not all finishes are appropriate. Oils or coatings must either remain stable (like mineral oil) or cure into a safe, inert surface (like tung oil or certain hardwax oils).
Comparing the Most Reliable Options
| Finish Type | Benefits | Drawbacks | Best Use Case |
|---|---|---|---|
| Mineral oil | Affordable, widely available, quick to apply | Needs frequent reapplication | Beginner boards, bulk Etsy products |
| Mineral oil + beeswax (board cream) | More water resistance, smooth satin feel | Slightly more work to make and apply | Gift boards, mid-range products |
| Pure tung oil | Hardens into a durable film, rich color | Long cure time, multiple coats | Premium and end-grain boards |
| Hardwax-oil blends (food contact compliant) | Long-lasting, easy maintenance, modern durability | More expensive, brand-specific instructions | High-end kitchenware |
Avoid: vegetable cooking oils (go rancid), “boiled” linseed oil (contains chemical driers), and thick polyurethane films (can chip under knives).
Supplies Checklist
Before diving into step-by-step applications, gather the essentials:
- 220–320 grit sandpaper
- Lint-free rags or shop towels
- Food-grade mineral oil
- Beeswax and optional carnauba wax
- Heat-safe container (for wax blends)
- Nitrile gloves
- Painter’s pyramids or scrap blocks for elevating the board
Related: Compact Bookshelf for Small Spaces
Method 1: Food-Grade Mineral Oil
This is the simplest and most popular choice—perfect for anyone who wants quick protection with minimal fuss.
Steps:
- Sand your board to 220–320 grit and remove dust.
- Warm mineral oil slightly in hot water (optional, but improves penetration).
- Flood the board surface and rub the oil in with a rag. Cover faces, edges, and end grain.
- Allow the board to soak for 20–30 minutes. Reapply to dry spots.
- Flip and repeat.
- After soaking, buff away excess until dry to the touch.
- Let the board rest overnight. For end-grain, repeat the process the next day.
Maintenance: Re-oil monthly or whenever the surface looks pale and water no longer beads.
Method 2: Mineral Oil + Beeswax Conditioner
Often called “board butter” or “board cream,” this upgrade combines mineral oil with melted beeswax for a finish that lasts longer and feels silky.
Make the blend:
- Ratio: 4 parts mineral oil to 1 part beeswax.
- Melt gently in a double boiler, stir, and pour into tins to cool.
Steps:
- Pre-oil your board with mineral oil (as above) and let it rest overnight.
- Rub a small amount of board butter over all surfaces.
- Allow it to sit for 30–60 minutes.
- Buff vigorously until smooth and non-greasy.
Maintenance: Refresh every 1–2 months or after heavy scrubbing.
Method 3: Pure Tung Oil
Unlike mineral oil, tung oil hardens (polymerizes) into a tough, waterproof layer when cured properly.
Steps:
- Sand board to 220 grit.
- Apply a thin coat of pure tung oil with a cloth, working into the grain.
- After 20 minutes, wipe off all excess.
- Allow 24 hours to cure between coats.
- Repeat 3–5 times for full coverage.
- Let the board cure at least 7 days (up to 30 for full hardness) before food use.
Tip: Always use 100% pure tung oil, not “tung oil finish” (which often contains solvents or varnishes).
Method 4: Hardwax Oil
Modern hardwax oils are blends of natural oils and waxes designed for food contact when cured. Brands vary, so always follow instructions.
Steps:
- Sand to 180–240 grit.
- Apply a very thin coat with a rag or pad.
- Work it into the wood with circular motions.
- After 10–15 minutes, wipe away excess.
- Allow 24–48 hours of curing between coats.
- Two coats usually suffice.
Maintenance: Refresh as needed with the same oil or a matching maintenance product.
Next step: Download Free 440 page book + Free woodworking plans
Special Notes for End-Grain Boards
End grain absorbs far more oil than edge grain. Always:
- Apply extra coats.
- Let the board soak longer.
- Seal both sides evenly to prevent warping.
Related: 5 Profitable Woodworking Projects You Can Start Today
Bamboo Boards
Bamboo is denser and less absorbent than hardwoods. The finishing process is similar, but oil takes longer to penetrate. Use warmed mineral oil and always finish both faces.

Cleaning & Care
- Wash quickly with mild soap and warm water.
- Dry upright—never leave boards flat in standing water.
- Sanitize with vinegar or diluted hydrogen peroxide.
- Deodorize by scrubbing with lemon and salt.
- Never put wooden boards in the dishwasher.
Troubleshooting
- Sticky finish: Too much oil left on—wipe thoroughly and let cure longer.
- Blotchy absorption: Sand more evenly before finishing.
- Rough texture after washing: Lightly sand with 320 grit and re-oil.
Restoring Old Boards
Sand out stains and scratches, moving from coarse to fine grits. Wipe clean, then refinish with your preferred method. A dry, gray board can usually be restored to like-new condition in under an hour.
Making Money on Etsy: Selling Handmade Cutting Boards
If you’re exploring ways to earn extra income with woodworking, cutting boards are a smart and profitable choice. Selling cutting boards on Etsy gives makers the chance to showcase their skills, reach a large audience of buyers, and build a steady stream of sales. These everyday kitchen tools are not only functional but also serve as stylish décor, making them a customer favorite.
Why Cutting Boards Are a Profitable Product
Etsy shoppers value creativity, craftsmanship, and personalization—qualities that cutting boards naturally provide. From sleek edge-grain maple boards to rustic live-edge walnut slabs or engraved wedding gifts, the variety of designs you can offer is endless. Their compact size makes them easier to ship compared to larger woodworking projects, which helps keep costs down and profit margins higher.
Related: Small Kitchen Woodworking Projects to Build and Sell on Etsy
Steps to Boost Your Etsy Success
To increase your chances of making money by selling cutting boards on Etsy, focus on:
- Material Selection – Hardwoods like walnut, cherry, and maple are durable, attractive, and food-safe.
- Creative Add-Ons – Personalization through laser engraving or unique finishes sets your shop apart.
- Search Optimization – Use targeted keywords such as personalized cutting board, handmade wooden board, and rustic chopping board in your titles, product descriptions, and tags to capture Etsy search traffic.
Marketing and Pricing Tips
Check competitor pricing before setting your own, ensuring your boards are both affordable and profitable. Use bright, high-resolution photos that highlight the grain and craftsmanship. Promote your products beyond Etsy by posting on Instagram, Pinterest, and relevant Facebook groups, drawing more visitors to your shop.
FAQs
What’s the absolute best finish?
For ease: mineral oil. For luxury: mineral oil + beeswax. For durability: tung oil or hardwax oil.
How often should I refinish?
Mineral oil: monthly. Tung/hardwax oils: every 6–12 months.
Can I use coconut oil?
No—like olive oil, it can spoil and develop rancid smells.
Should I finish both sides?
Always—this keeps the board stable.
Best wishes,
Alexander.


Leave a Reply
You must be logged in to post a comment.